Yoga for Thyroid
How Yoga Can Help Regulate Thyroid
Thyroid disorder has become very common over the last decade. It is an endocrine disorder that either manifests as hyperthyroidism or hypothyroidism which is excess or under-production of the thyroid hormone. These hormones adversely affect metabolism in our bodies when not produced in precise quantities. Some symptoms include fatigue, weight gain or loss, change in heart rate, and swelling of the neck. A stressful lifestyle is a foundation for all diseases, and there is a known connection between thyroid aggravation and stress. Yoga is known to improve thyroid function by reducing stress. The twisting, compression, and stretching that is required for yoga asanas aids in massaging the butterfly-shaped thyroid gland to regulate the releasing of hormones.
Read our blog on Yoga for thyroid gland
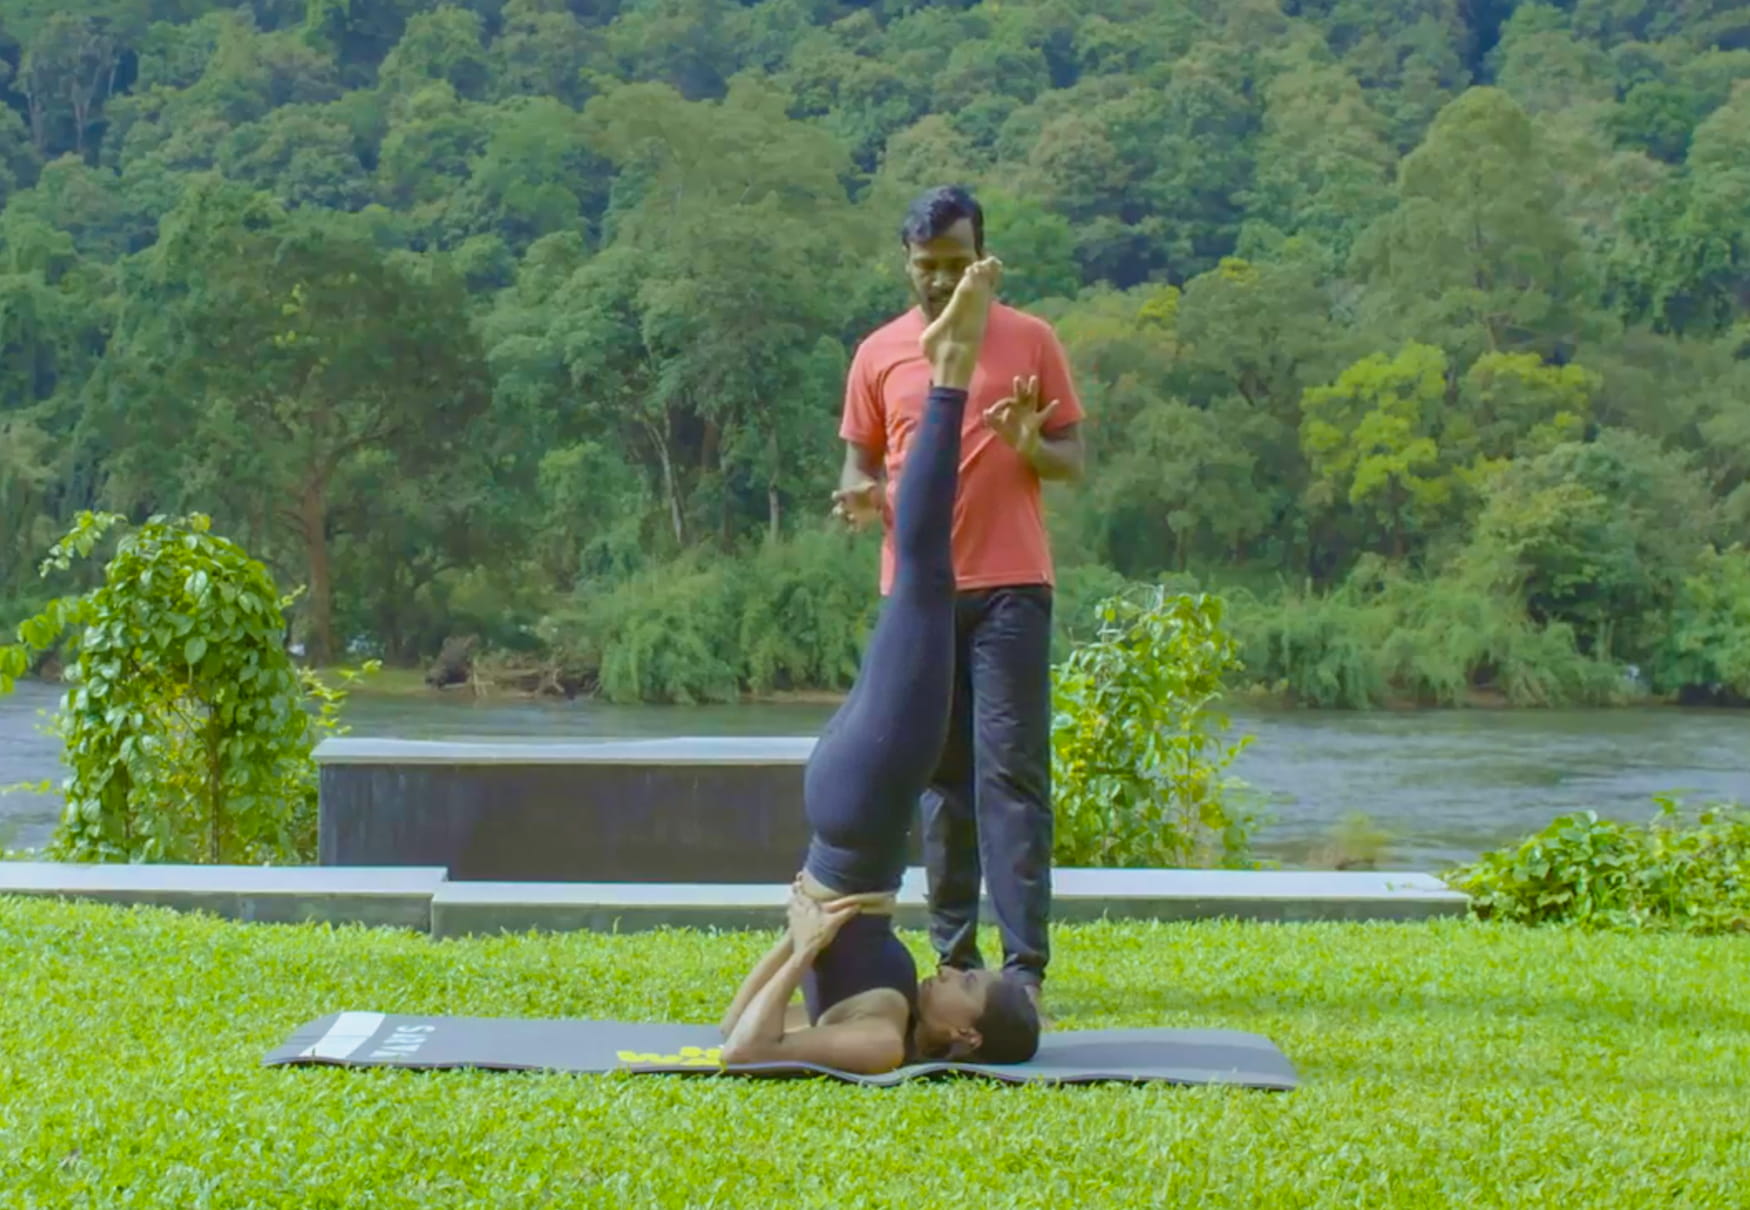
Sarvangasana (Shoulder Stand Pose)
Steps:
- Lie down in the supine position or lying on your back.
- Raise your legs slowly upward and bring them to a 90° angle.
- Bring the legs towards the head by raising the buttocks up.
- Raise the legs, abdomen and chest; try to form a straight line.
- Place the palms on your back for support.
- Place the chin against the chest.
- Maintain the position as long as it is comfortable.
- Try to maintain the pose for up to 30 seconds or more.
- Slowly return back to the original position.
- While doing this, first lower the buttocks with hands supporting the back and slowly come to the surface or in the original position.
- Perform it twice or thrice.
Halasana (Plough Pose)
Steps:
- Lie down on the surface of the floor in a supine position. Keep your arms beside the body and put the palms face down.
- Bend your knees and rock your legs right up and back.
- As you exhale slowly, straighten the knees for attaining proper posture. Make sure that you keep the torso perfectly perpendicular to the floor while stretching and extending the legs fully.
- Inhale slowly and draw the chin away from the sternum; soften the opening of your throat just up the shoulders and press into the ground using your upper arms for creating a lift.
- In order to make the most of this pose, move your legs as further as possible from your head. You will achieve chin lock during this stage. The pressure at this point is put on the thyroid glands.
- Interlace your fingers behind your back to gently the shoulder blades squeeze together. If you want, you can also slide your arms right to your head to grab your toes.
- Stay in this position while maintaining your breathing for about 4 to 10 counts based on your overall level of comfort.
- Exhale as you gradually retrieve your legs and keep them perpendicular to the mat.
Watch our Video on Yoga for Thyroid: Most Effective Yoga Poses for Thyroid Problems
Matsyasana (Fish Pose)
Steps:
- Sit in Lotus Posture. Have a couple of slow and deep breaths.
- Bend slowly backwards and lie on the floor without releasing Lotus Posture. Support your body with your forearms and elbows while bending backwards.
- Lift the chest a little upward. Turn the crown of the head towards the floor. Make an arch of the back to the maximum comfortable extent.
- Hold on the big toes with elbows touching the floor. Now the body is supported by the legs, buttocks, and head.
- Breathe slowly. Keep the position as long as it is comfortable.
- To release the position, bring down the back to the floor and straighten the head. Come back to the sitting posture by placing the palms on the floor. Release the Lotus Posture.
- Repeat the above steps with the legs crossed on the opposite side in Lotus Posture.
Setubandhasana (Bridge Pose)
Steps:
- First lie down in Shavasana or in spine position.
- Your arms should be on the sides of your thighs.
- Now, fold your knees and clasp your ankle with your palms.
- The distance between the feet should be 10 inches.
- With each inhale, raise your back in a relaxed manner as possible as you can.
- One can also be on toes by raising the heels. It gives more stretching to the back as well as the neck.
- Maintain the pose for 30 seconds or more with slow inhaling and exhaling.
- Bring your back down with a deep exhale and have a rest.
- Repeat this process 3 to 5 times.
Bhujangasana (Cobra Pose)
Steps:
- To start the pose, lie on your stomach and place your forehead on the floor.
- You can have your feet together, or hip-width apart.
- Keep the tops of your feet pressing against the floor.
- Place your hands underneath your shoulders, keeping your elbows close to your body.
- Draw your shoulder blades back and down, and try to maintain this throughout the pose.
- Draw your pubic bone towards the floor to stabilize your lower back, and press your feet actively onto the floor.
- With the next inhale, start lifting your head and chest off the floor. Be mindful of opening the chest, and don't place all of your weight onto your hands. Keep the elbows slightly bent and keep the back muscles working. Take your hands off the floor for a moment to see what is a comfortable, maintainable height for you.
- Keep your shoulders relaxed.
- With the exhale lower yourself back onto the ground.
- Take 2-3 rounds of inhaling yourself up into the cobra, and exhaling down to the floor. Then hold for 2-3 full breaths, and come back down. Rest on the floor for a few breaths, or enjoy Child's pose as a gentle counterpose.
Who Should Avoid
Weak or injured cervical muscles. Weak legs, weak hamstring muscles or calf muscles. Pregnant women or women during their menstruation time should avoid these. Those with enlarged thyroid, spleen and liver should avoid these yoga poses as a lot of pressure is put on the lower abdomen during this pose.